Learn how to customize the Tissue Culture settings for your organization, including health indicators, media types, production types, and vessel stages.
Before You Start
Make sure you have:
- Administrator access to GrowerIQ
- The Tissue Culture module enabled for your organization
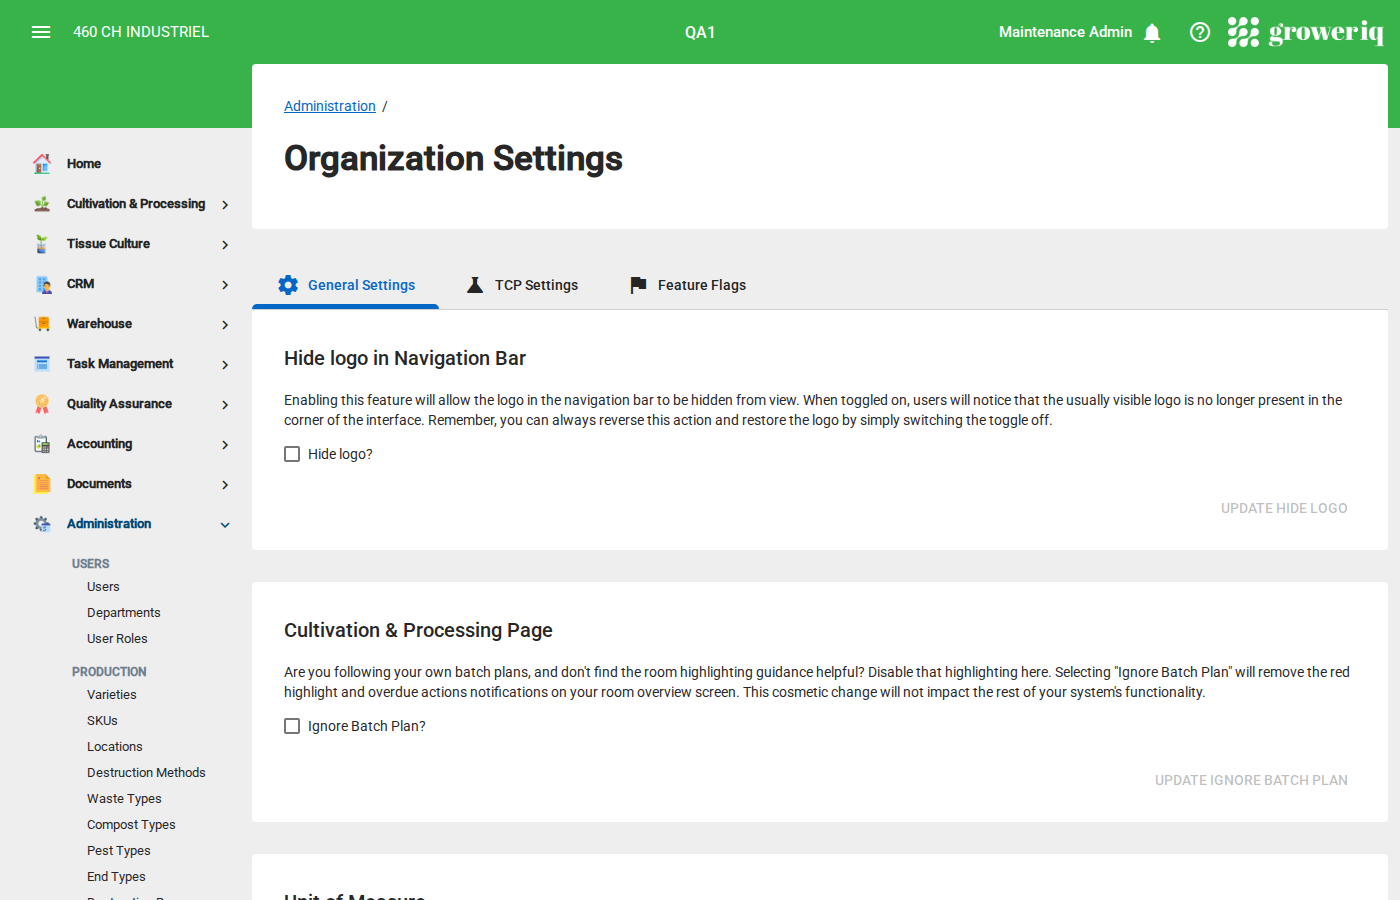
Step 1: Navigate to Organization Settings
From the left sidebar, click Administration, then click Organization Settings.
You will see the Organization Settings page with several tabs at the top.
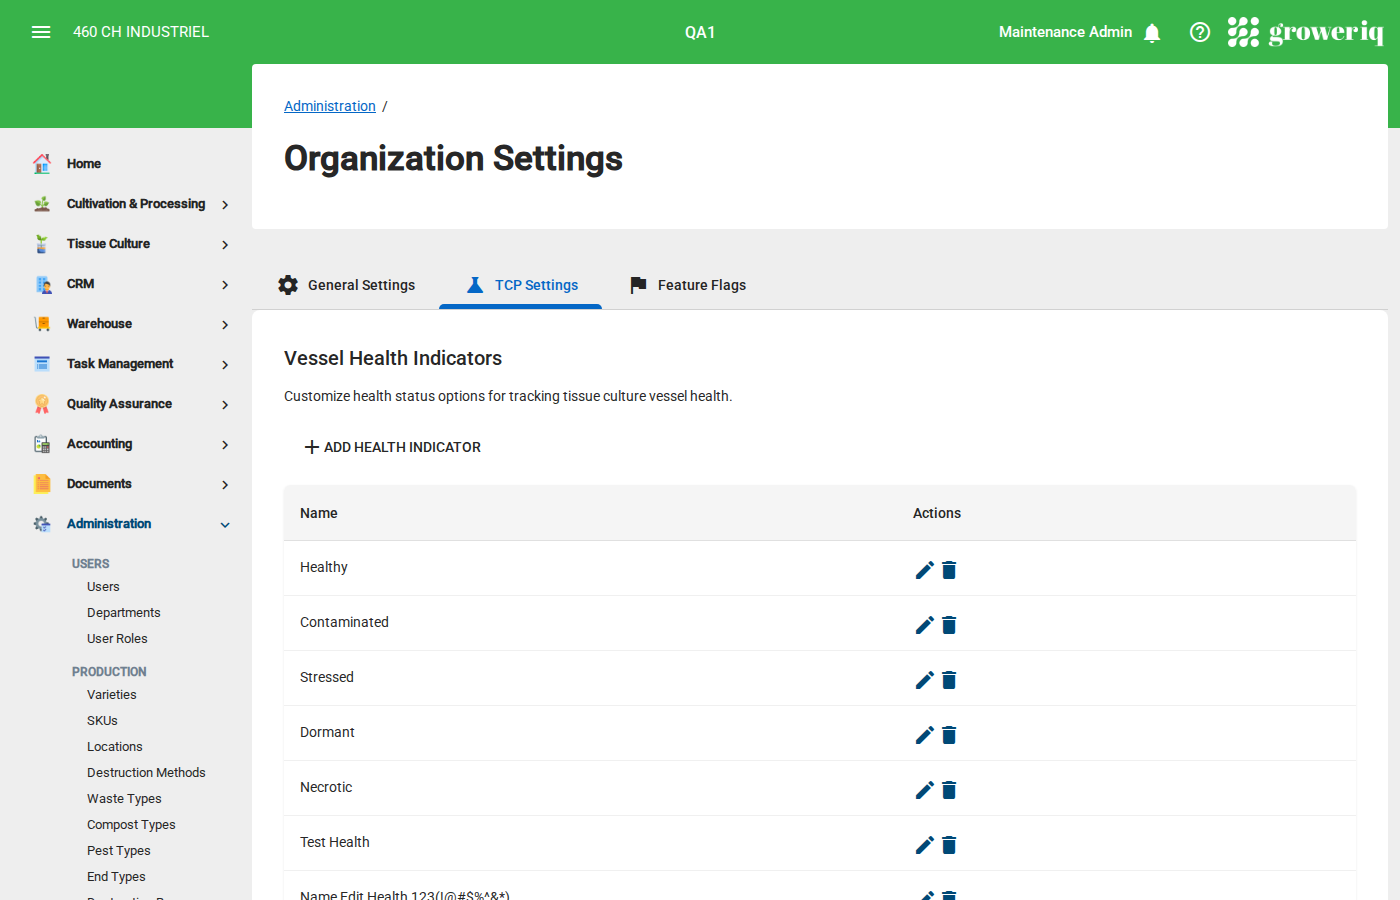
Step 2: Open the TCP Settings Tab
Click the TCP Settings tab (with the science icon) to view all tissue culture configuration options.
The page contains four sections:
- Vessel Health Indicators - Health status options for vessels
- Vessel Media Types - Growing media options for vessels
- Vessel Production Types - Production run types for vessels
- Vessel Stages - Development stages that vessels progress through
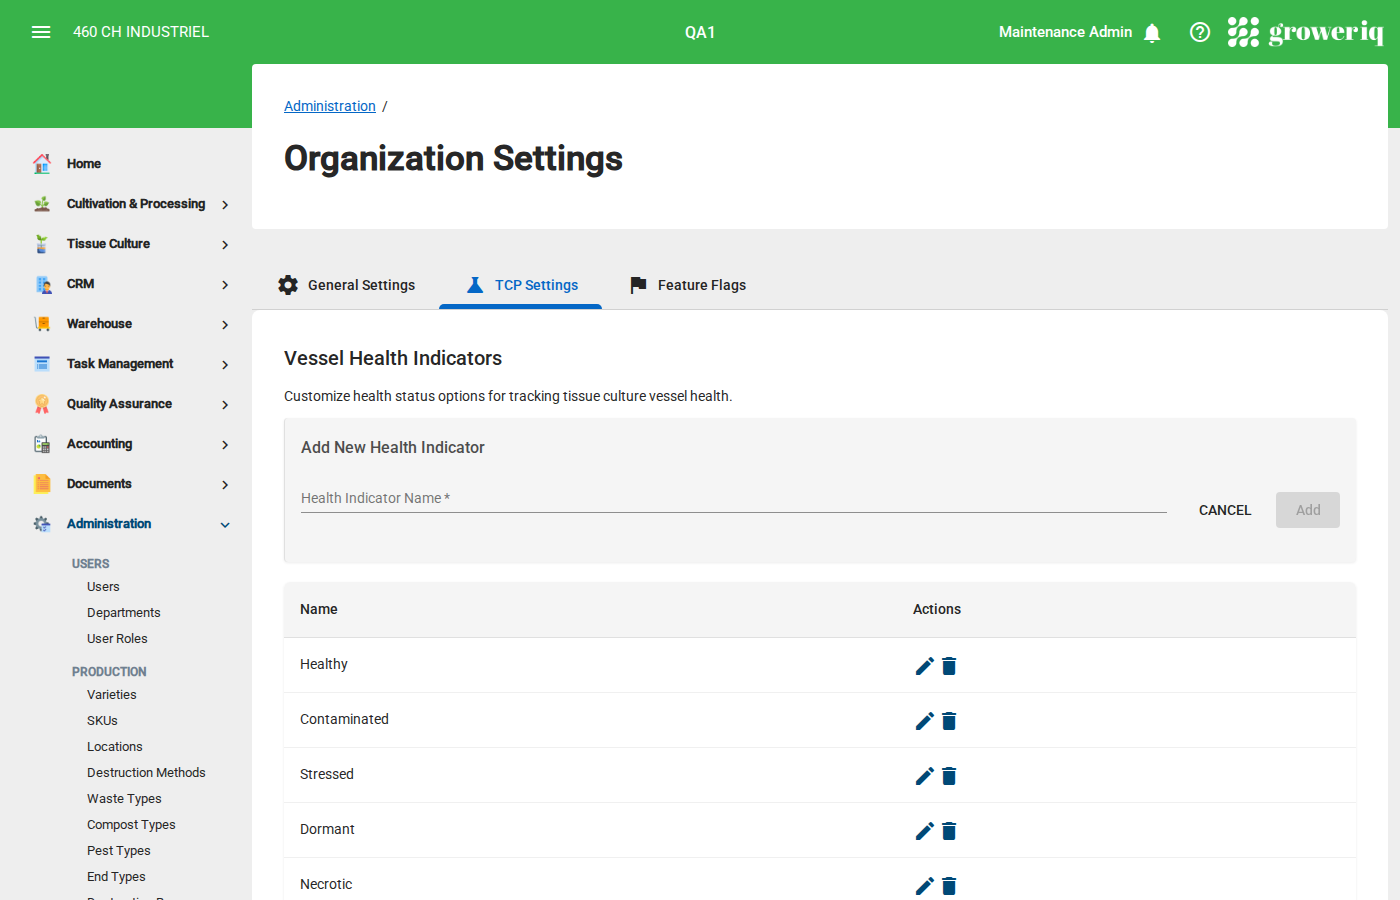
Step 3: Add a New Item
To add a new option to any section, click the Add button (e.g., + Add Health Indicator).
An inline form will appear at the top of the section:
- Enter a Name for the new item (maximum 50 characters)
- Click Add to save it
Click Cancel to discard the new item.
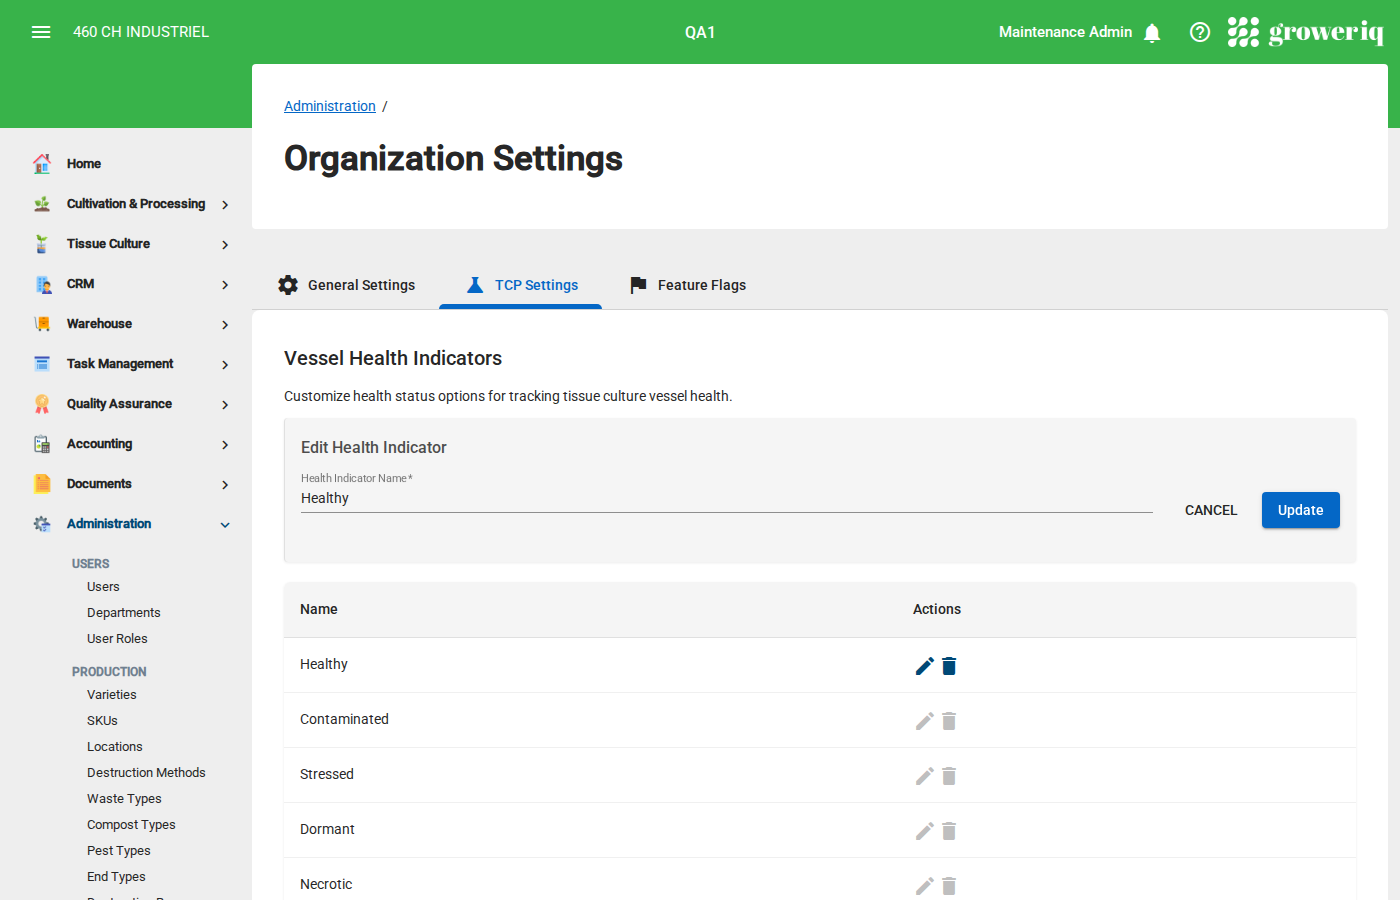
Step 4: Edit an Existing Item
To rename an existing item, click the pencil icon in the Actions column for that row.
The edit form will appear with the current name pre-filled:
- Update the Name as needed
- Click Update to save your changes
Click Cancel to discard changes.
Note
While editing one item, the edit and delete buttons on all other items are disabled to prevent conflicts.
Step 5: Delete an Item
To remove an item, click the trash icon in the Actions column for that row.
Warning
Do not delete items that are currently in use by vessels. Removing items that are assigned to existing vessels may cause data inconsistencies in reports. If you no longer need an option, consider adding a replacement first and updating your vessels before deleting the old one.
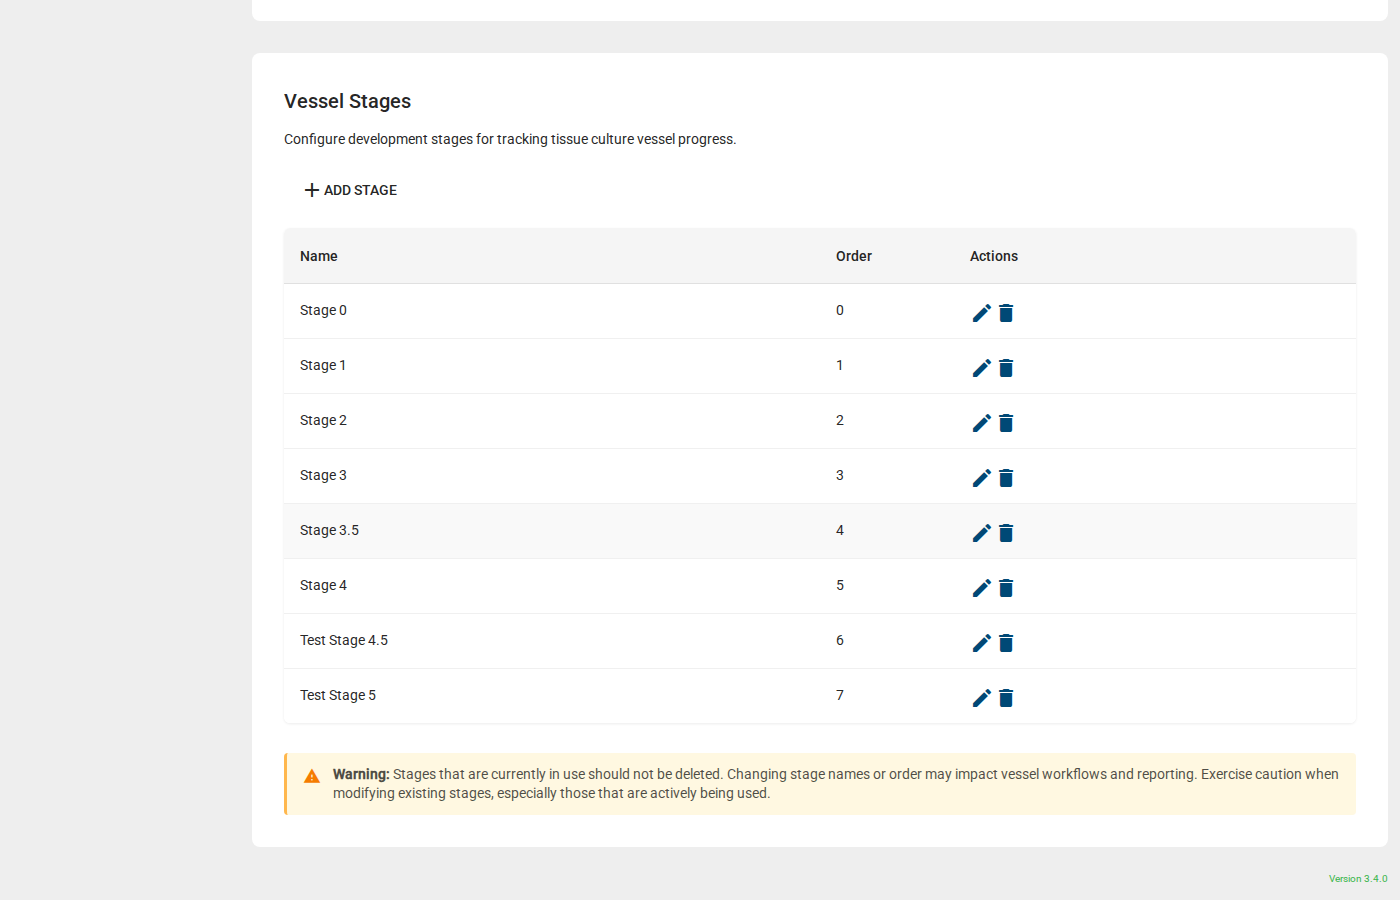
Step 6: Configure Vessel Stages
The Vessel Stages section works slightly differently from the other sections. Each stage has two fields:
- Stage Name - The display name for the stage (e.g., "Stage 0", "Stage 1")
- Stage Order - A number that determines the sequence of stages (0, 1, 2, etc.)
Stages are automatically sorted by their order number. When adding a new stage, the order will default to one more than the current highest value.
Tip
The stage order determines the progression path for your vessels. Make sure to number them sequentially to reflect your tissue culture workflow.
You're Done!
You now know how to configure TCP settings in GrowerIQ. These settings define the dropdown options available throughout the Tissue Culture module.
Next steps:
- Create vessel batches using your configured stages
- Record health indicators on individual vessels
- Track vessel progress through your defined stages
Need Help?
If you run into issues, contact support at support@groweriq.ca