When someone signs in to the Mobile Scanner and hits an "Access Denied" screen, it means their user role has not been granted scanner access yet. This is an administrator task. This guide shows you how to grant a role the scanner views and actions it needs, in the GrowerIQ web app.
In this article:
🎯 Who this is for
This is for administrators who manage user roles in GrowerIQ. Scanner users cannot grant their own access. If a team member reports an "Access Denied" message on the scanner, you (or another administrator) set their role's scanner permissions here.
Scanner and web permissions are separate
A role's Mobile Scanner permissions are independent of its Web Permissions. Giving a role web access does not give it scanner access, and changing one never changes the other. You set scanner access on its own tab.
✅ Before you begin
- You need administrator access to Administration > User Roles.
- Decide which inventory types the role should be able to open on the scanner, and which actions it should be able to perform.
New roles start with no scanner access
A newly created role has no scanner access until you grant it. Until you select view types and actions, anyone with that role will be blocked on the scanner. (The Admin role is the exception: it always has full scanner access and cannot be edited.)
📝 Grant scanner access to a role
- Go to Administration > User Roles.
- Click Edit Roles.
- Find the role you want to update and expand it.
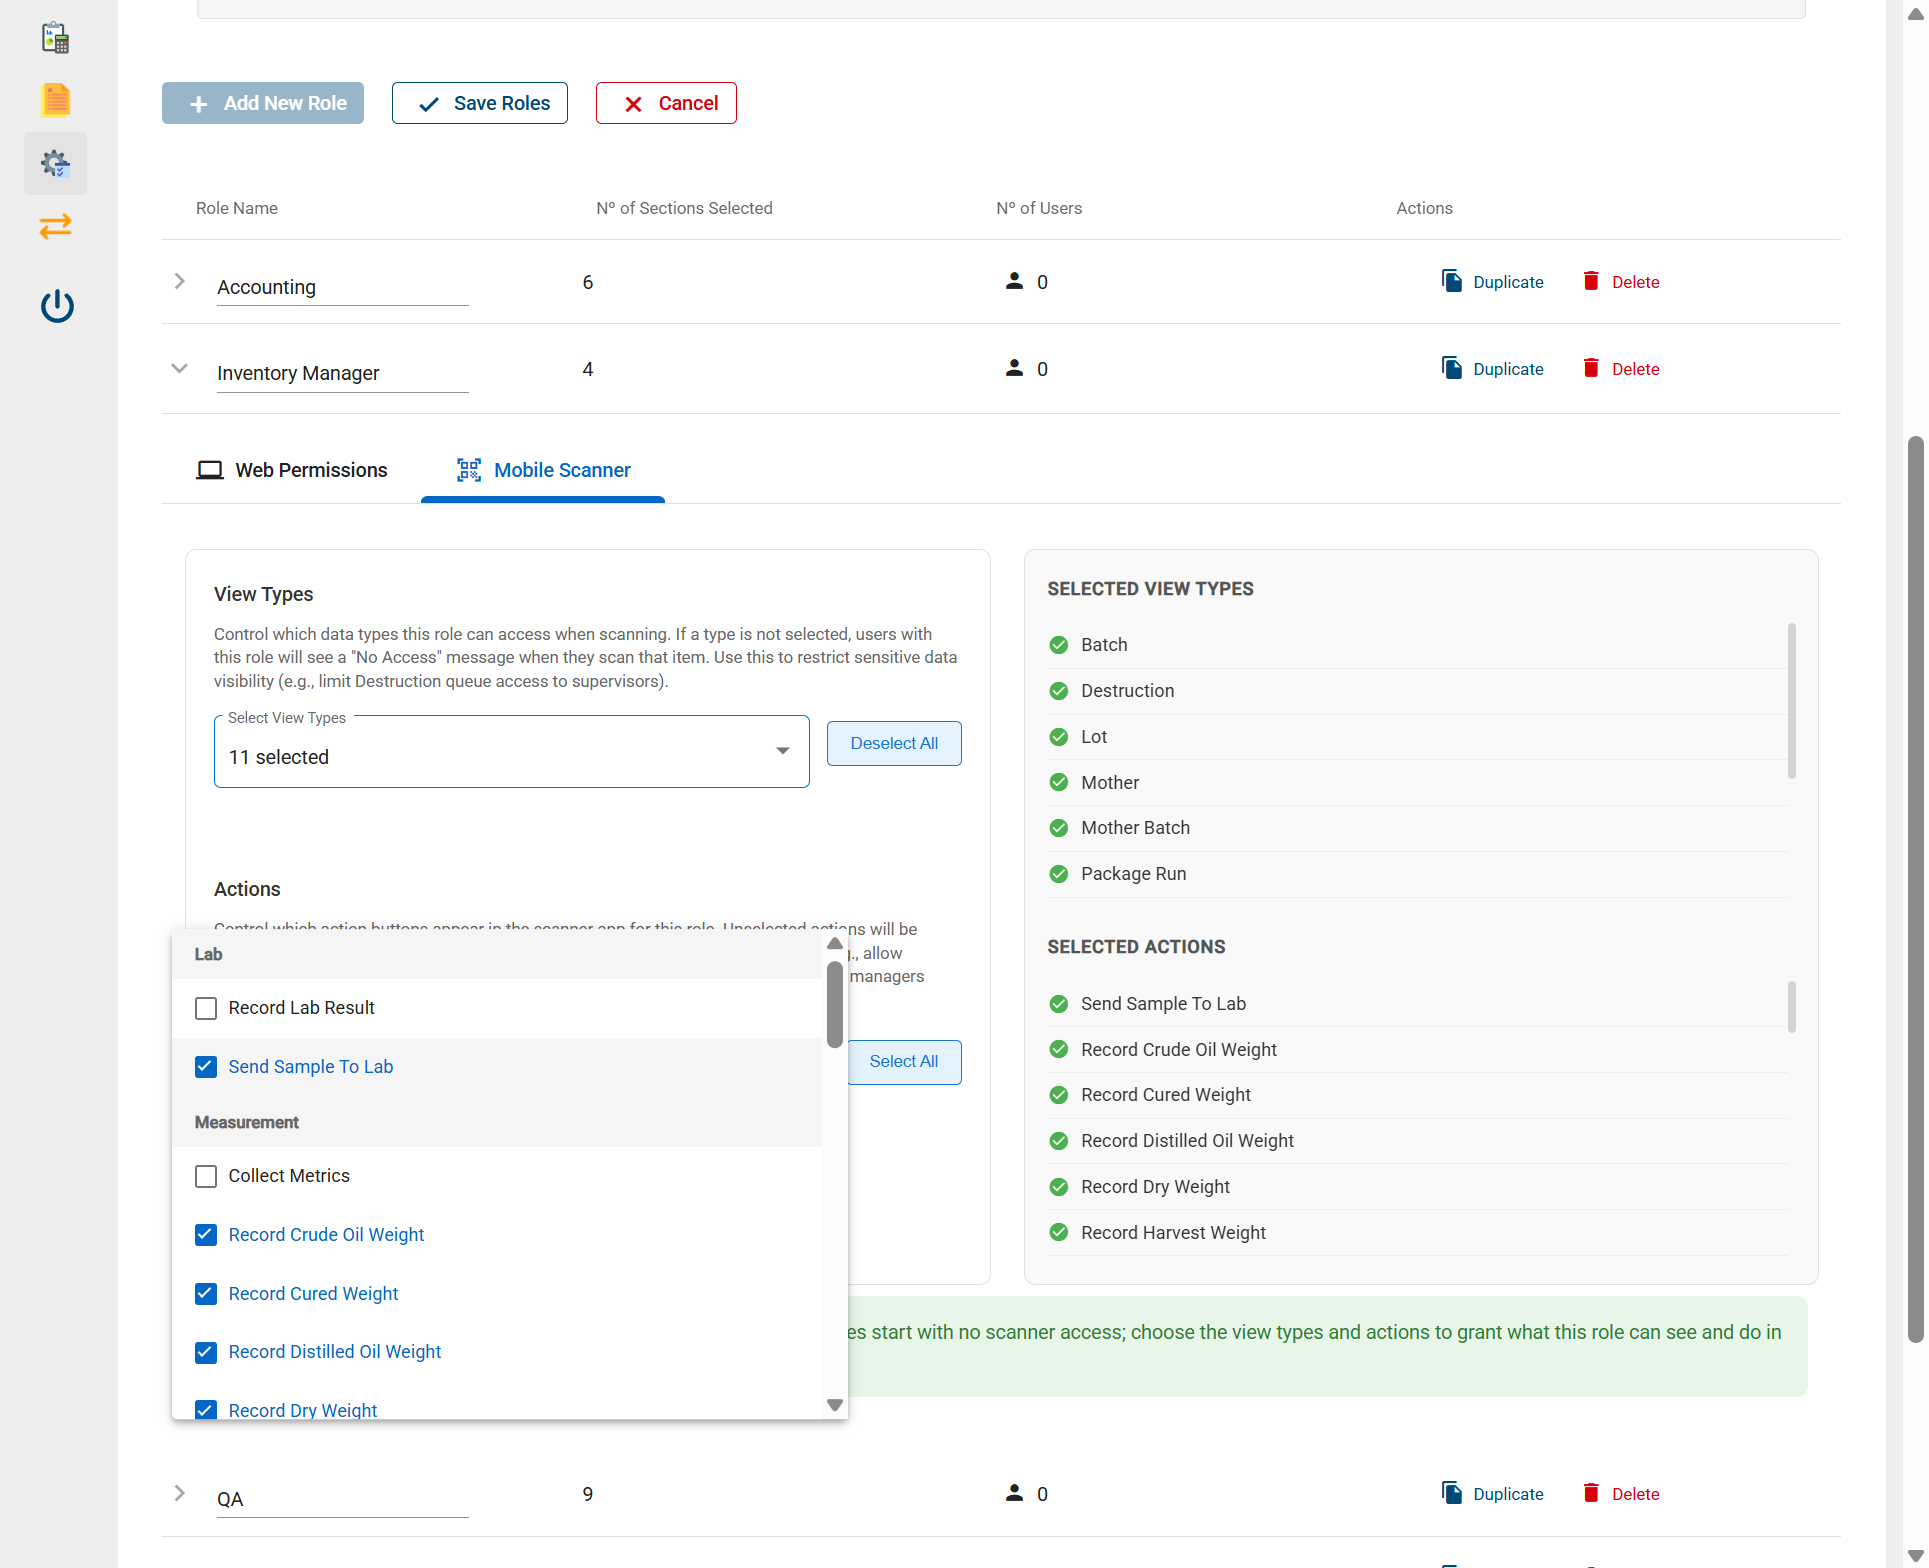
- Open the Mobile Scanner tab (it sits next to Web Permissions).
- Under View Types, choose which data types this role can open when scanning - for example Batch, Lot, Mother, Mother Batch, Package Run, or Destruction. If a type is not selected, users with this role are blocked from opening that item on the scanner. Use Select All or Deselect All to set them quickly.
- Under Actions, choose which action buttons appear in the scanner for this role. Actions are grouped by category (such as Measurement or Lab). Anything you leave unselected is hidden from the scanner's action menu - for example, you can let a role record weights but not advance stages.
- Check the Selected View Types and Selected Actions panels on the right to confirm what the role will get.
- Click Save Roles.
Grant only what the role needs
Use view types and actions to give each role the least access it needs to do its job - for example, allow line workers to record weights and move locations, but keep destruction queueing or sensitive views limited to supervisors.
🔎 What the user sees
After you save, the user must log out and back in on the scanner, because scanner permissions reload at login.
- If a role is missing a view type, the user can log in but sees an "Access Denied" screen when they scan that kind of item.
- If a role is missing an action, that action button simply does not appear on the item's screen.
Grant the missing view type or action, have the user sign in again, and the item or action becomes available.
💡 Tips
- Start from a similar role. Use Duplicate on an existing role to copy its setup, then adjust the scanner tab.
- Web and scanner are independent. If a role can do something on the web but not the scanner (or the reverse), check the matching tab.
- Test with one user first before rolling a new role out to a whole team.