Picking the right label type and size, and checking the live preview before you save, makes sure your labels come out exactly as you expect. Here is how.
In this article:
🎯 Why this matters
Two settings shape every label: its type and its size.
- The type decides which data fields you can put on the label (an inventory label can show batch data, a shipment label can show shipping data, and so on).
- The size has to match the physical label stock loaded in your printer.
Get these right up front and everything downstream just works.
🏷️ Choose a label type
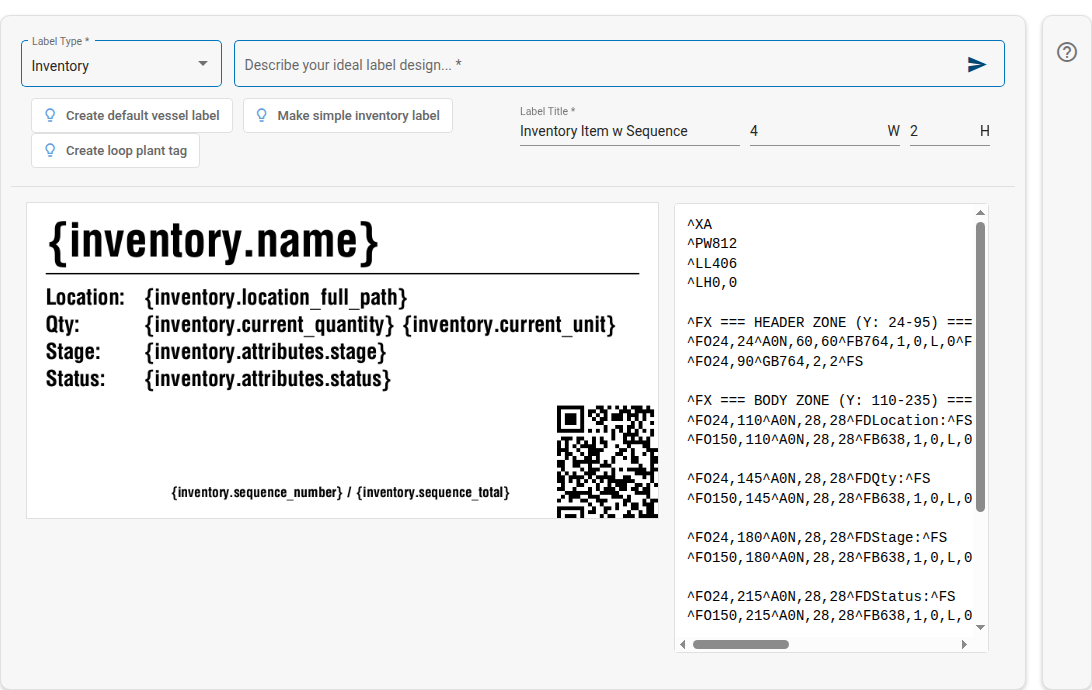
Pick the type from the Label Type dropdown. Your choice controls the data fields available to the label.
| Type | Use for |
|---|---|
| Inventory | Lots, batches, and general inventory items |
| Received Inventory | Incoming received stock |
| Vessel / Vessel Batch | Tissue culture vessels and their batches |
| Sample | QA samples |
| Shipment / Order | Outbound shipments and orders |
| Supply | Consumable supply lots |
| Location | Storage locations |
| User | Staff badges |
| Destruction Item | Items queued for destruction |
| Loop Label (Plant Tag) | Plant tags, printed many per sheet |
| Wholesale | Wholesale package runs |
📐 Set the size
Enter the Width (W) and Height (H) in inches.
- The default is 4" wide × 2" high.
- Choosing Loop Label sets 1" × 10" automatically (you can still change it).
- Sizes can range from 0.5" to 12".
Match your label stock
Set the size to the actual labels loaded in your printer. A mismatch is the most common cause of a label that prints cut off or off-centre.
👁️ Use the live preview
As you build, the preview updates automatically so you can see the result.
- The preview renders from your design a moment after each change.
- Enter a Preview Entity ID (the ID of a real record) to see the label filled with that record's actual data instead of placeholders.
No preview yet?
If the preview area says "No Preview Yet", give the builder a description first, or paste in a design. The preview appears once there is something to render.
💾 Name and save
- Enter a Label Title.
- Click Save Label.
When you reopen a saved label, the button changes to Update Label so your edits replace the original.
Unique titles
If you see "Label title already exists", choose a different title. Each label needs its own name.
Next: Add data to your label to put live record data, dates, and barcodes on it.